On the Wall

Wallpaper for Boys' Rooms: The Complete Australian Buying Guide
Boys bedroom wallpaper done properly: adventure themes that last, grounded palettes for sleep, boy-proof materials and custom sizing.
Learn more
Eco-Friendly Wall Murals: The Sustainable Guide
Eco-friendly wall murals made honest: PVC-free non-woven, water-based inks, print-on-demand, Australian-made. Specifications, not greenwashing.
Learn more
Wall Murals for Kitchens: A Designer's Guide
Kitchens are the riskiest room in the house for a wall mural. They are also, quietly, the room where a mural can do the most work. Every kitchen hosts a daily hospitality moment — a guest walks in, keeps walking past the rangehood, and finds themselves standing inside a painted forest, a coastal horizon or a chinoiserie garden while the kettle goes on. The risk is real. The reward is the reason we keep being asked to design for kitchens anyway. Most decorators will tell you not to put wallpaper in a kitchen at all. We disagree — carefully. Kitchens are a zoned space. Some walls are working walls, covered in splatter and steam, and those are the wrong place for a mural. Other walls are hospitality walls — the dining nook, the breakfast banquette, the butler's pantry, the feature wall opposite the cabinetry — and those are arguably the best mural real estate in the house. This is the designer's guide to doing it properly. Where a mural wins, where it fails, which materials survive a working kitchen, and which twelve murals from our Painted Wall Murals collection actually belong in the room. We ship to more than 40 countries with all import duties covered, and every mural is custom-sized to exact wall dimensions from our Central Coast, NSW studio. Mosswood Forest Panoramic · Vintage Willow Garden Panoramic · Calm Seas Painted Mural The honest placement map: where a kitchen mural wins, and where it fails Before we talk about which design to choose, we have to talk about where it goes. This is the single most important decision in a kitchen. A mural on the wrong wall will fade, grease over and peel at the edges. A mural on the right wall will outlast the cabinetry. Here is the map we give every client. ✅ Dining nook end-wall — the perfect mural zone. The dining nook is far enough from the cooktop to stay clean, close enough to the kitchen to feel like part of the room, and it is a seated moment — people actually look at this wall. A panoramic mural across the nook end-wall is possibly the best use of a mural anywhere in an Australian home. ✅ Breakfast banquette wall — mural wins here. A banquette pushes the mural above eye-level and keeps the mural at a comfortable viewing distance. Because the banquette itself takes the wear, the mural lives untouched above it. ✅ Feature wall opposite cabinetry — great if out of spatter range. The wall you see when you walk into the kitchen, but not the wall your cooktop is against. Keep a minimum of 1.2 metres (roughly 4 feet) between the mural and any heat or oil source. ✅ Butler's pantry / walk-in pantry — the hidden mural moment. A pantry is a small enclosed room where you can go full-drama: deep emerald, moody seagrass, a chinoiserie garden. Because nobody cooks in a butler's pantry, you get all the mood with none of the maintenance. ⚠ Island pendant wall — OK, but audit first. If the island has a sink or hob, treat the wall behind it like a cooking wall. If the island is prep-only and lives opposite a clean feature wall, that feature wall is fine. ❌ Direct above cooktop — fail. Grease aerosolises during cooking. Within six months a mural directly above a working cooktop will yellow, lift at the seams and start to smell of oil. Use tempered glass over a printed mural instead (see splashback section below). ❌ Behind the sink, within 60cm (24 inches) — fail. Sustained water contact is worse for wallpaper than steam. A mural that starts 60cm away from a sink and sits above the tap-splash line is usually fine; a mural that wraps down behind the tap is not. The rule we give clients: mural walls are hospitality walls. If a guest is likely to look at the wall while they sit, it's the right wall. If you stand in front of it holding a frying pan, it's the wrong wall. Six kitchen-mural moods that actually work Once you've picked a hospitality wall, the next decision is mood. Different kitchens want different stories. These are the six mural categories we lean on most often. 1. Botanical / forest — the Hamptons kitchen Cool-light botanical and soft forest murals are the default choice for Hamptons, coastal-country and white-oak kitchens. They bring depth and green to a pale cabinetry scheme without fighting it. Painterly rather than photographic botanicals read as artwork — which is what you want when you're sitting under it every breakfast. Featured: Ethereal Canopy Mural Wallpaper For this brief we specify the Ethereal Canopy Mural across the dining-nook end-wall. When the client wants more floral detail than forest, the Vintage Willow Garden Panoramic Mural is the closest thing we have to a hand-painted tapestry. 2. Coastal panoramic — for coastal homes and beach houses Coastal kitchens usually already have a view — ocean, pool, garden. The mural has to work with that view, not compete with it. Panoramic coastal murals with soft blues, linen tones and tree silhouettes extend the view rather than replace it. We use them on the wall opposite the window, so the outside view and the painted view frame the room from both sides. Coastal Trees Mural · Coastal Palms in Palisade Blue Use the Coastal Trees Mural for the inland-coastal feel — Byron, Newport, the Mornington Peninsula. Use Coastal Palms in Palisade Blue for a bolder Queensland or Pacific-coast brief where the palette can hold more blue. 3. Mediterranean — travertine, olive grove, Marrakech The travertine kitchen is having a long moment — warm stone, plaster rangehoods, oak cabinetry. Mediterranean murals finish the story. Olive groves, cypress hills, distant warm-stone villages. Quieter than tropical palms, warmer than English botanicals — ideal for kitchens where the joinery is already doing the work and the wall just needs to hold the tone. Featured: Olive Groves Painted Mural The Olive Groves Painted Mural sits against travertine and oak; the Marrakech View Painted Mural brings architecture — arches, walls, hills — where straight botanical isn't enough. Both work with lime-wash or plaster-effect walls elsewhere in the room. 4. Moody dark — the butler's pantry mural Dark murals in an open kitchen are a risk, but dark murals in a butler's pantry, walk-in pantry or coffee station are one of our favourite design moves. The small scale of a pantry carries saturation well, and because you don't cook there, the mural stays clean. A guest who wanders in looking for a wine glass finds themselves standing inside an emerald forest. That's the moment. Vintage Woodland Trees in Emerald · Moody Seagrass Panoramic The Vintage Woodland Trees in Emerald Green is our most requested pantry mural. The Moody Seagrass Panoramic is its quieter cousin — less green, more atmosphere, excellent behind open brass shelving. 5. Abstract textural — plaster-effect modern kitchens Contemporary-plaster kitchens don't want a scene — they want texture. Abstract, plaster-effect and mineral-fade murals read as painted walls rather than wallpaper, which is precisely why they work where you want visual depth without narrative. If the rest of the kitchen is limewash, micro-cement or solid-colour joinery, this is the mural category to go to. Featured: Mineral Fade Panoramic in Stone Taupe The Mineral Fade Panoramic in Stone Taupe is our go-to for modern plaster kitchens — layered, almost Venetian-plaster, without any trowel-work. The Abstract Paint Texture Mural is a bolder alternative for a single textural feature wall. 6. Heritage / chinoiserie — traditional kitchens For a period kitchen — Victorian terraces, Federation homes, classic Hamptons — heritage and chinoiserie murals do work that no other wallcovering can. A chinoiserie garden on the dining-nook end-wall of a terrace kitchen turns a three-metre wall into a hand-painted hotel dining room. This category also forgives narrow kitchens best, because the mural pulls the eye past the joinery. Chinoiserie Garden in Soft Blue · Vintage Tapestry Botanica in Emerald Use the Chinoiserie Garden in Soft Blue in lighter period schemes — white joinery, marble benches, soft blue upholstery. The Vintage Tapestry Botanica in Emerald suits darker, more tailored kitchens — green cabinetry, brass hardware, timber floors. Material choice: what actually survives an Australian kitchen Kitchen placement makes material choice matter more than almost any other room. The order of durability runs clean: Non-woven with a vinyl coating: the gold standard for kitchen murals. The substrate is dimensionally stable and the coating lets you wipe the surface. Our default specification for any kitchen mural outside a butler's pantry. Paste-the-wall non-woven: excellent behind banquettes, dining nooks and pantry walls. More forgiving of kitchen humidity swings than traditional paper. Pure paper paste-the-paper: not recommended for kitchens. Paper expands with steam, and the paste can let go over time. Peel-and-stick (self-adhesive): yes, but heavy-duty only. Keep it out of the direct splash zone and use non-woven paste-the-wall for permanent installations wherever possible. Our managing humidity guide for Australian bathrooms covers the chemistry in detail — the logic transfers directly to kitchens. Cleaning and maintenance: the truthful version A kitchen mural is a lifestyle commitment. The honest maintenance story: Vinyl-coated non-woven: wipe with a soft, damp microfibre cloth and a drop of dish soap. No abrasives, solvents or melamine sponges. Paste-the-wall without coating: dust-off only. Blot spills, don't rub. Peel-and-stick: barely-damp cloth, then dry fully — water tracks down and loosens edges. Anything within 1 metre of a cooktop: expect to wipe weekly. If you wouldn't wipe your artwork weekly, move the mural further away. This is why the placement map matters. A well-placed kitchen mural asks for almost no maintenance; a badly placed one asks for it every week. Scale: planning the wall before you plan the design Typical Australian kitchen walls run between 2.5 and 4 metres (8 to 13 feet) wide, with ceiling heights of 2.4–2.7 metres for standard builds and 3m+ for Queenslanders and renovated Federation homes. Because we custom-size every mural to exact wall dimensions, the starting point is always a measurement, never a standard panel. Before ordering, measure every wall in metres and note the size and position of every window, door, powerpoint, switch and pendant cable; the height of the banquette, cabinetry or appliance against the wall; and the ceiling condition (cornices, VJ panels, exposed beams). Our wallpaper measuring guide walks through capturing these numbers, and our complete Australian mural hanging guide covers the install sequence. Lighting: why kitchen spotlighting eats mural drama Most Australian kitchens are lit with 4000K–5000K downlights — great for cooking, brutal for murals. Cool downlights flatten painterly detail. This is solvable. Warm the temperature. Swap cool-white downlights over the mural wall for 2700K–3000K bulbs. The mural will suddenly read as painted rather than printed. Add accent lighting. A wall-washer or picture light over the mural wall transforms it at night. Pendants over a dining nook do this job automatically. Dim everything possible. Murals only come alive once you stop flooding the wall with task light. Galley kitchens vs island kitchens vs open-plan Different kitchen types want different mural strategies. Small galley kitchens: usually one single unbroken wall at the end of the galley. That end-wall is an ideal mural wall — it's the wall you see when you walk in and the furthest wall from cooking splatter. A panoramic mural here visually doubles the room. Island kitchens: the best mural wall is the feature wall opposite the island, at seated bench-level. Avoid the wall behind the island if the island has a sink or hob. Open-plan kitchen / living: treat the dining zone end-wall as the mural wall. The mural defines the dining space without walling it off — especially useful where the kitchen, dining and living room all share the same floor. Splashback murals: when you really do want a mural behind the hob Sometimes the client wants the scene directly behind the cooktop. The wallpaper can't go there, but the design can. Print the mural at scale, then install tempered glass over it as a splashback. You get the mural story with zero damage exposure, because the glass takes all the oil and heat. For bespoke splashback imagery — a photograph of your own garden, the landscape from the kitchen window, an heirloom painting — commission a custom design through our custom wallpaper studio and use the same artwork behind glass. The print can then be repeated as wallpaper on the dining-nook wall, tying the room together without repeating the maintenance risk. Peel-and-stick for rentals with tiny kitchens Renters and tiny kitchens are where peel-and-stick wallpaper earns its place. If you can't paper permanently, a heavy-duty peel-and-stick mural across the dining-nook end-wall is low-commitment and lease-safe. Prep the wall following our peel-and-stick wall prep guide — clean, fully cured paint, no silicone residues. Rental kitchens often have older paint and micro-grease films that defeat peel-and-stick adhesion unless you prep properly. Custom: photograph the view from your kitchen window The move we're asked for most often by clients with a good garden or view: photograph what's outside the kitchen window, and print it as a mural on the opposite wall. The result is a doubled view — the real garden through the window, the painted garden on the far wall. Our custom wallpaper service accepts your own photography, paintings or sketches and resizes them to fit your exact wall dimensions. It is, in our experience, the most personal thing you can put on a kitchen wall. Installation and finding a local professional Kitchen murals — particularly across a dining-nook end-wall or banquette wall — benefit from professional installation. The wall has to be clean, level, cured and primed, with sockets, switches and pendant cables worked around cleanly. Our wallpaper installer directory lists professional hangers across Australia, or use our paste-the-wall install guide if you're a confident DIYer. Further reading on kitchens and murals Companion guides: the designer's guide to the kitchen nook covers the nook wall in forensic detail; choosing the right kitchen wallpaper zooms out to the whole room; wall murals: the statement wall trend dominating 2026 places kitchen murals inside the wider trend story. Browse the full Painted Wall Murals collection when you're ready to shortlist. Frequently Asked Questions Does kitchen humidity and steam damage a wall mural? It depends on the material and distance from the steam source. A non-woven mural with a vinyl coating, installed at least 1 metre from the cooktop and sink, handles normal kitchen humidity comfortably. Pure paper wallpaper within 30cm of a sink or directly above a cooktop will fail — paper expands with humidity and paste breaks down with sustained moisture. Use the placement map above and specify vinyl-coated non-woven. How do I clean a wall mural in a kitchen? For vinyl-coated non-woven murals, use a soft microfibre cloth with warm water and a drop of dish soap. Wipe gently in the direction of the print and dry with a second cloth. Never use abrasives, melamine sponges, solvents or kitchen spray cleaners — these strip the coating. For uncoated paste-the-wall murals in dining nooks or pantries, dust only and blot spills. Can I put a wall mural directly behind my cooktop? No. Wallpaper behind a working cooktop fails within months — grease aerosolises during cooking, yellows the surface, lifts the seams and leaves an oil film that can't be cleaned off. If you want a mural scene behind your cooktop, reproduce it on tempered glass and install that as a splashback; the glass handles the grease and heat, and the mural is preserved visually. Is peel-and-stick wallpaper a viable choice for a kitchen? Yes, with caveats. Heavy-duty peel-and-stick murals work well on dining-nook end-walls, breakfast-banquette walls and feature walls more than a metre from any cooking or water source. Wall prep is critical — clean, cured paint with no silicone residue. Don't use peel-and-stick directly above cooktops, behind sinks, or behind steam ovens. Can I put a mural in my butler's pantry or walk-in pantry? A butler's pantry is arguably the best mural room in the whole house. The space is small, enclosed, not used for active cooking, and rarely gets direct splatter. That means you can use deeper, moodier, more detailed murals — emerald botanicals, moody seagrass, chinoiserie gardens — without the maintenance concerns of an open kitchen. A pantry mural also becomes a small surprise moment for guests who wander in looking for a wine glass. What size should a mural be in a kitchen breakfast nook? Most Australian kitchen nook walls are 2.5–3.5 metres wide and 2.4–2.7 metres tall. A mural should cover the full wall floor-to-ceiling and wall-to-wall — partial coverage reads as wallpaper rather than mural and loses the drama. Because we size every mural to your exact measurements from our Central Coast studio, you always get a single, seamless piece that fits the nook perfectly. Our wallpaper measuring guide walks through how to capture the numbers before ordering. Can I install a mural in a rental kitchen? Yes, with peel-and-stick. It's a landlord-friendly way to transform a rental kitchen without affecting the paint. Install only on the dining-nook end-wall or feature wall opposite the cabinetry — both stay cleanest and are easiest to remove at end of tenancy. Always prep the wall properly and test a small strip before the full install. How much does a custom kitchen mural cost? Kitchen murals are priced by the square metre because every wall is custom-sized from our studio. A typical dining-nook end-wall (around 3m × 2.5m / 10ft × 8ft) is substantially less than a commissioned hand-painted mural and far more flexible. All import duties are covered globally, $4.99 samples ship at 48cm × 40cm (19in × 16in) for colour-matching against cabinetry, and production runs four business days for full-price orders. Browse the Painted Wall Murals collection or commission a one-of-one through our custom wallpaper studio.
Learn more
Japandi Wallpaper: A Designer's Textural Guide
Japandi wallpaper is about texture over pattern — plaster, marble, stone. Designer guide to rooms, murals, peel-and-stick and custom options in Australia.
Learn more
New York Wallpaper: A Complete Home Decorating Guide
New York wallpaper guide for NYC apartments, brownstones, and pre-war interiors. Shop murals, peel-and-stick, and custom designs. Ships to NY with duties paid.
Learn more
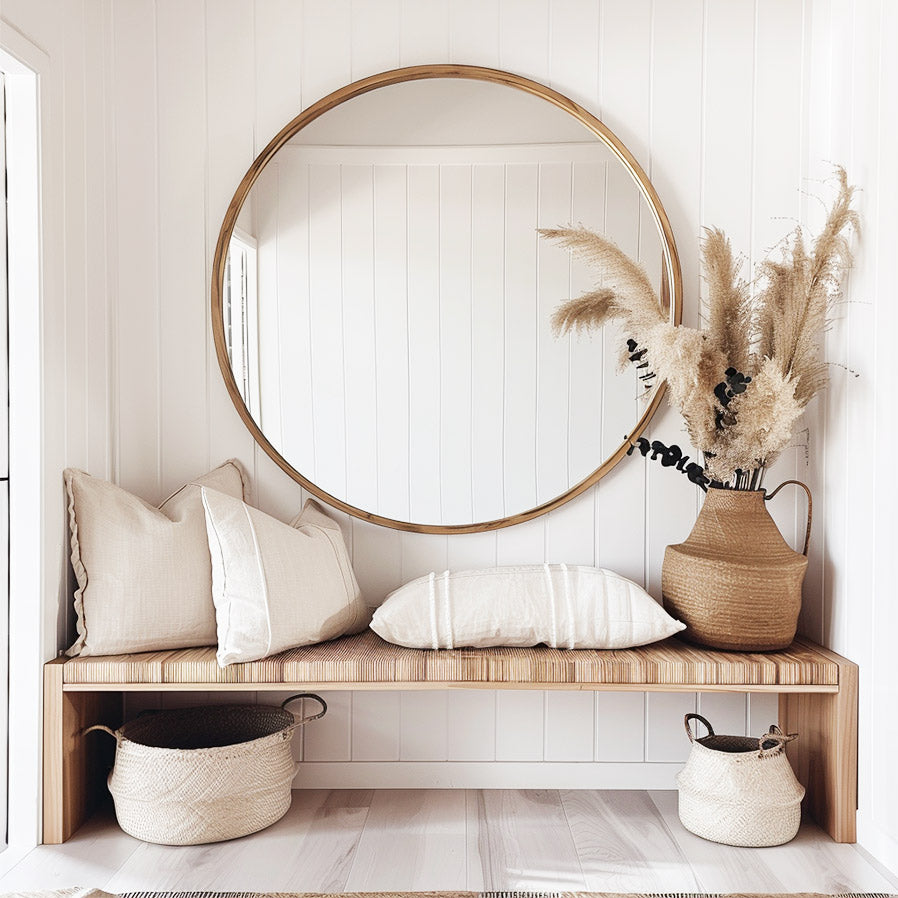
Entry & Hallway Wallpaper: First-Impression Interiors
Design the complete entry: wallpaper, art, mirror, lighting & console styling — an Australian designer's guide to first-impression interiors.
Learn more
All Four Walls: When to Wrap a Room in Wallpaper (Or Not)
Thinking of wrapping all four walls in wallpaper? The designer's guide to pattern drenching a room, when it works and when it doesn't.
Learn more
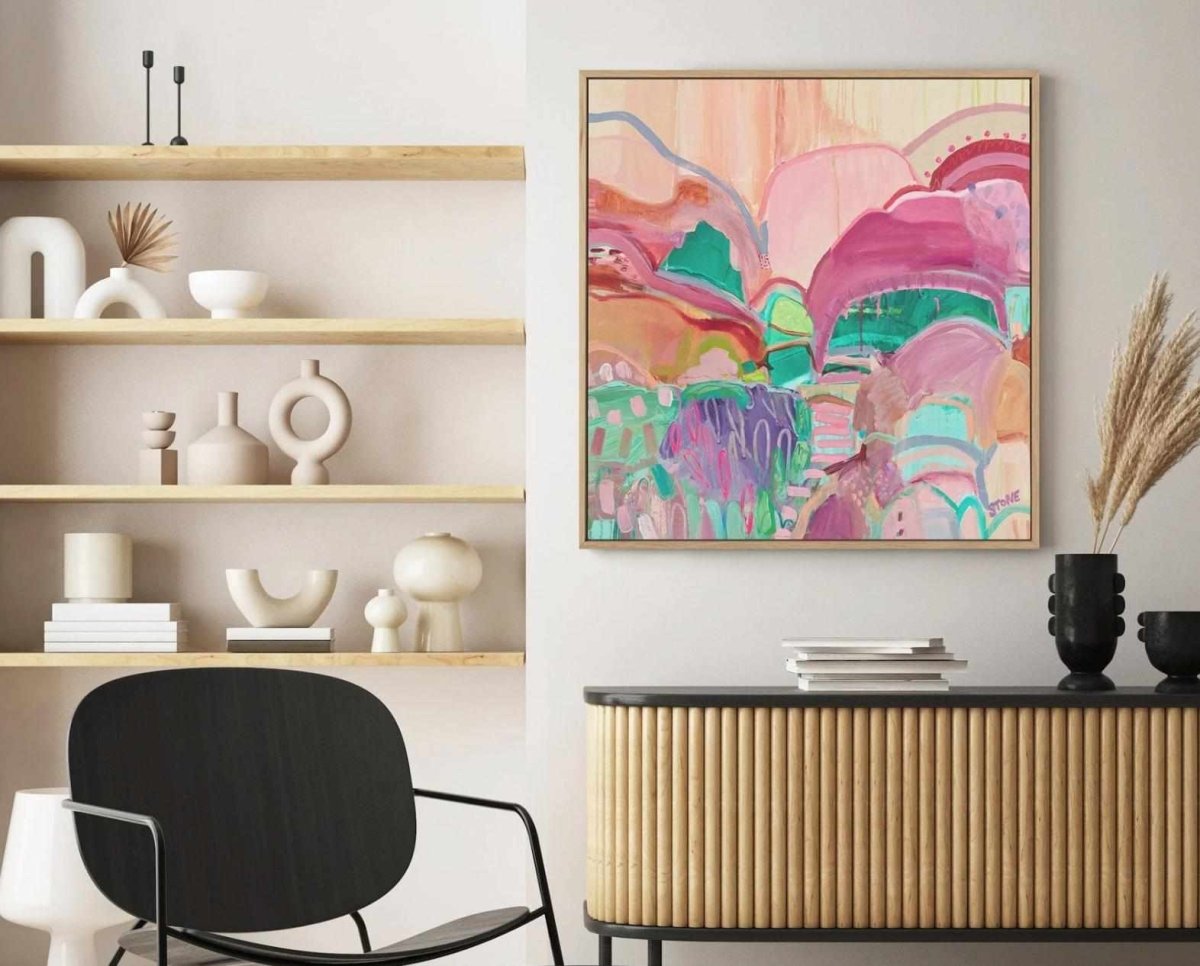
Home Office Wall Art & Wallpaper: Ideas That Work
Home office wall art and wallpaper ideas that look premium on Zoom and actually help you focus. Seven wall looks, shop the mood.
Learn more
How to Style a Half Wall of Wallpaper — The Look That's Taking Over Interiors
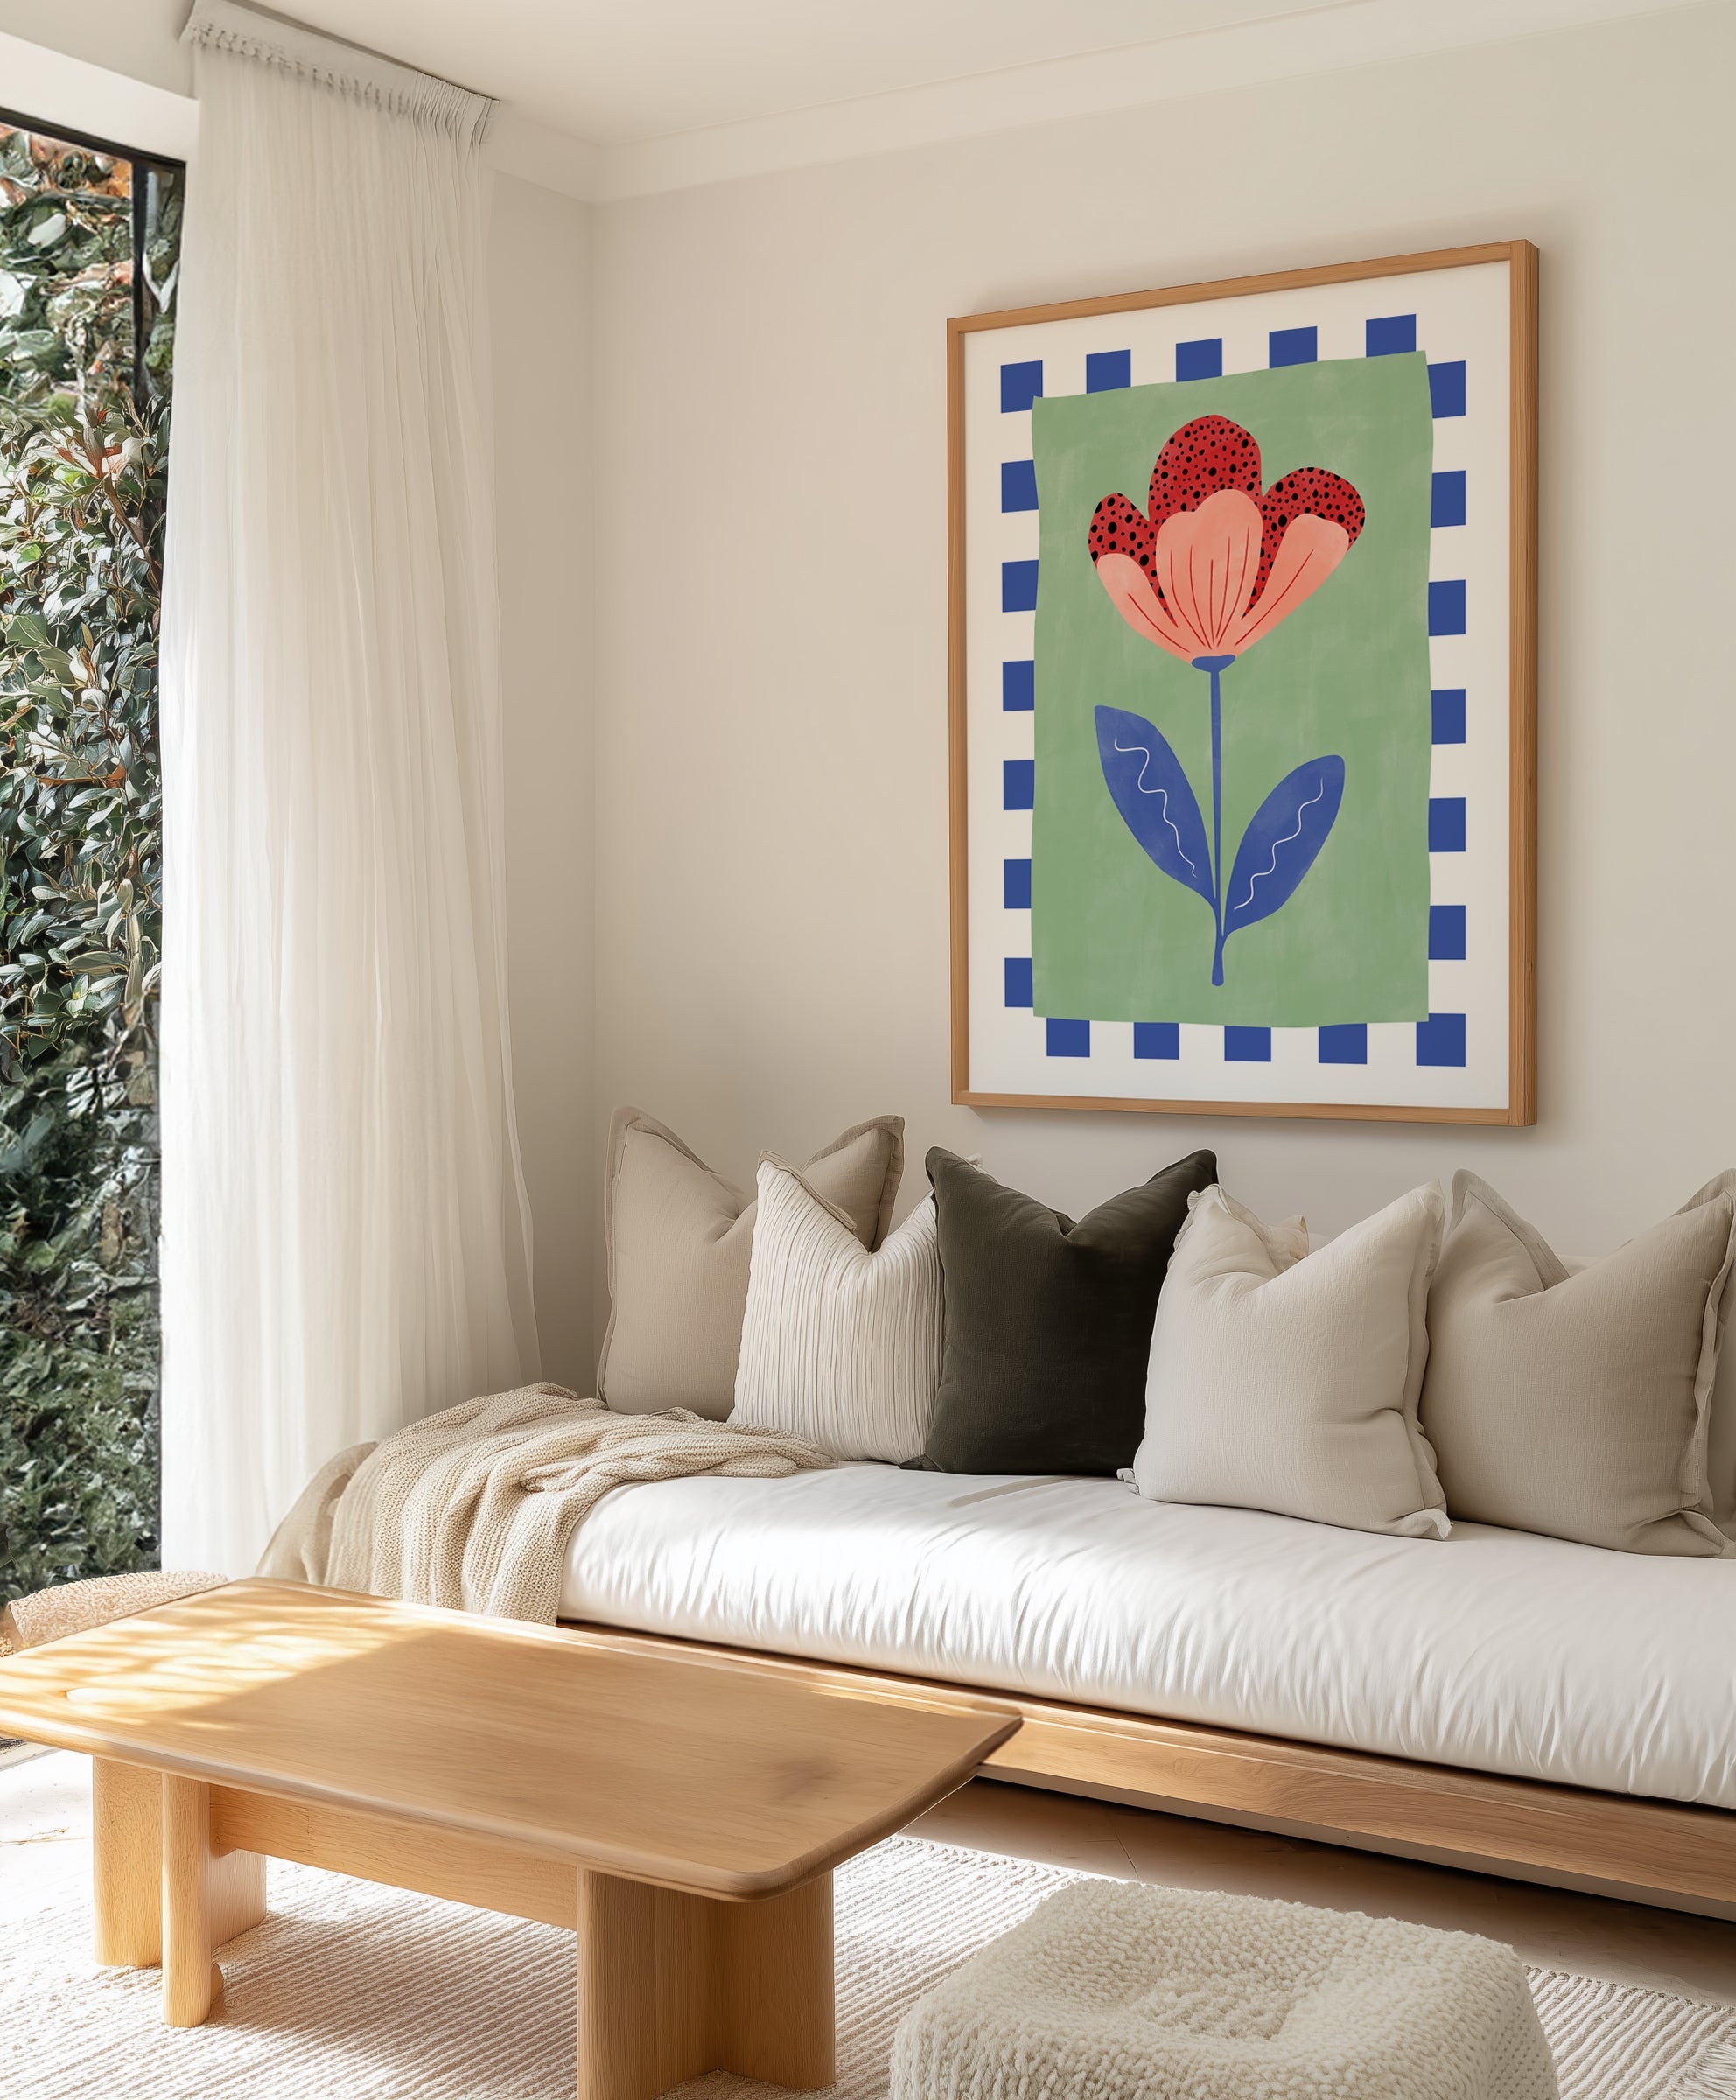
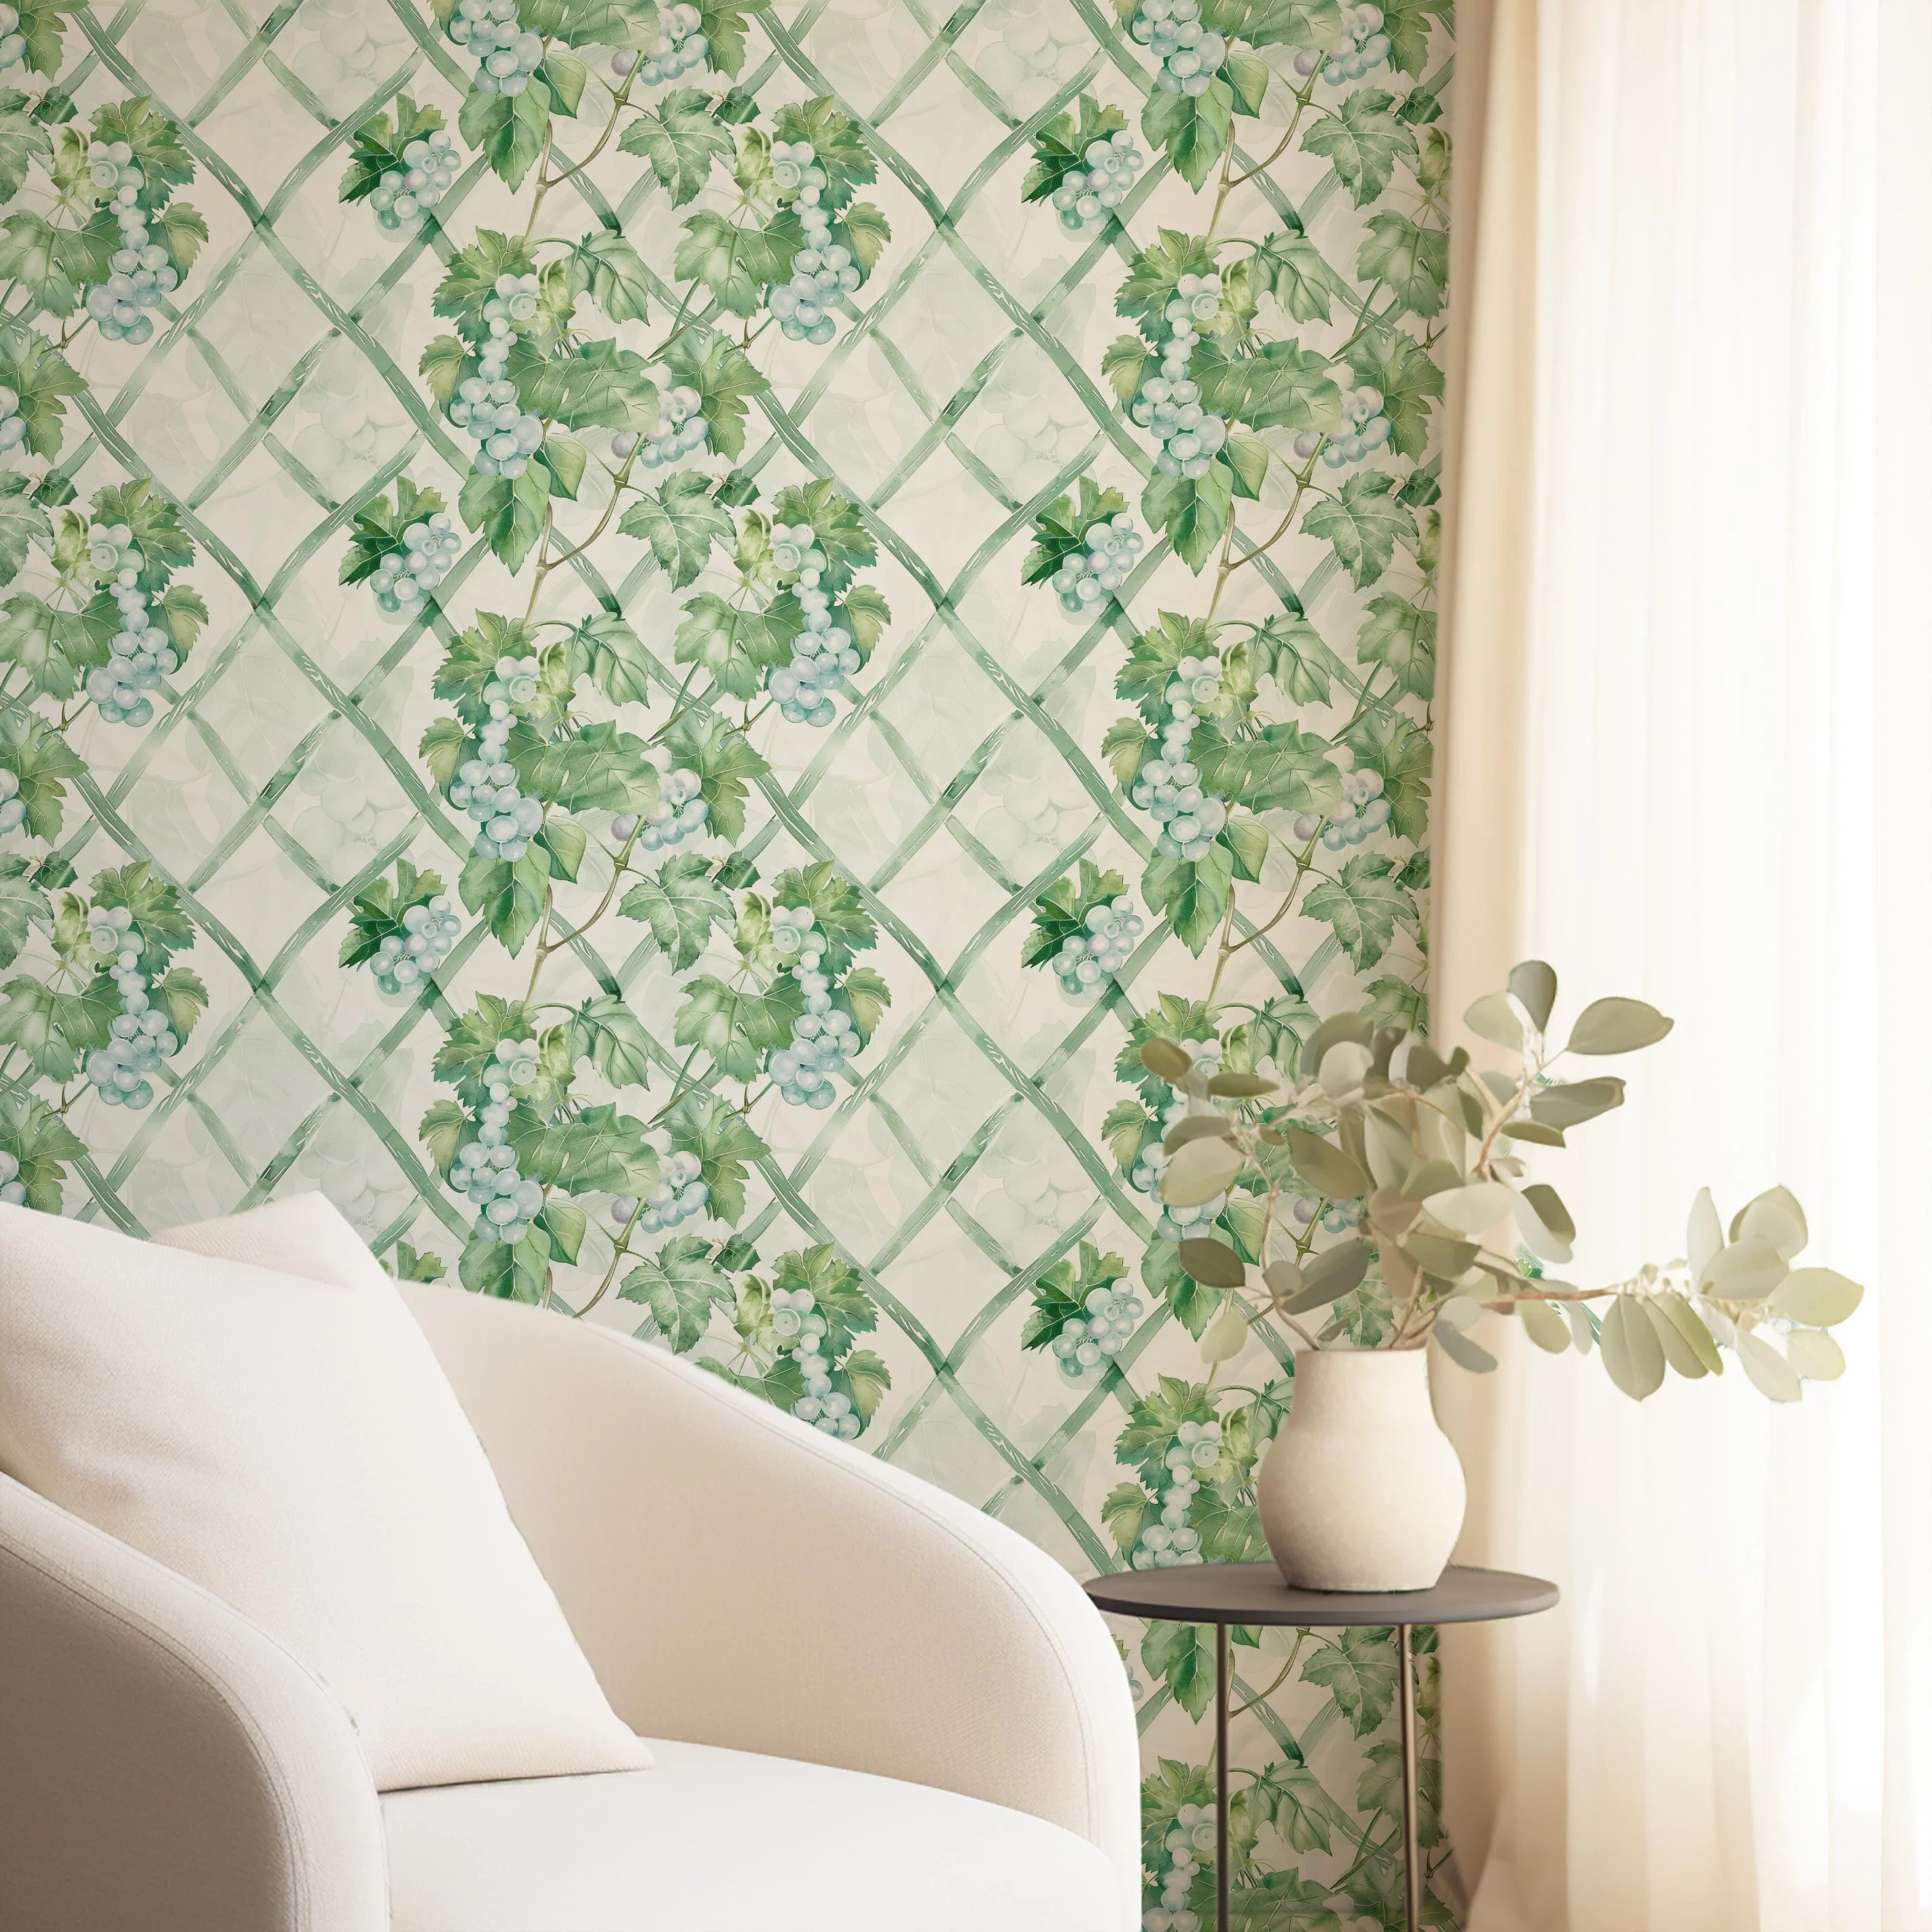
The half wall wallpaper trend is one of the most versatile ways to introduce pattern and texture into a room without overwhelming it. By applying wallpaper from the floor to dado or wainscoting height — typically 90 to 120 centimetres — you create a sophisticated layered look that works in bedrooms, hallways, dining rooms, and living spaces. At Olive et Oriel, we manufacture every wallpaper order to your wall measurements — panels numbered in sequence, ready to install. For half wall applications, this precision is especially valuable. Why the Half Wall Works A full wall of bold wallpaper can feel like a commitment. A half wall gives you the impact of pattern at eye level while keeping the upper portion clean and airy. The contrast between wallpaper and painted wall creates visual depth that makes rooms feel more considered and designed. This technique is particularly effective with our hand-painted murals — the panoramic artwork sits at the base of the wall where it catches the most light and draws the eye naturally. The painted wall above provides breathing room, letting the mural speak without competing for attention. How to Measure for a Half Wall For a standard half wall application, measure from your floor to your desired break point — usually 90cm to 120cm depending on your ceiling height and furniture placement. Add 5cm excess at the top for a clean trim line. When ordering from Olive et Oriel, enter your half wall height as the wall height. We will manufacture panels at exactly that dimension, plus our complimentary 10cm height margin for installation adjustments. Your panels arrive numbered — Panel 1, Panel 2, Panel 3 — so installation is straightforward even at a non-standard height. Choosing the Right Pattern Not every wallpaper works at half height. Patterns that work best include: Botanical and floral designs — the organic shapes create a natural garden-bed effect at the base of the wall Textured finishes — our Paste the Wall Linen substrate adds tactile depth that is enhanced by the half wall contrast Hand-painted murals — panoramic scenes that flow across the lower half create a genuine artwork-on-the-wall effect Geometric patterns — clean lines and structured repeats work consideredly against a solid-colour upper wall Because we offer free colour and scale customisation on every design, you can adjust any pattern to work at half wall height. Need the botanical slightly smaller so the repeat fits within 100cm? Done. Want the sage green shifted to match your existing paint? We will adjust it at no extra cost. The Finishing Touch: The Transition Line How you handle the line where wallpaper meets paint defines the entire look. Three options: Timber dado rail: The classic choice. A painted or natural timber moulding creates a clean, architectural break. Works consideredly in Hamptons, heritage, and farmhouse interiors. Shadow line: A recessed strip that creates a subtle groove between wallpaper and paint. Modern and minimal. Clean edge: Simply trim the wallpaper to a straight line with no moulding. Contemporary and understated. Whichever method you choose, use a sharp utility blade and a straight edge for the trim. Replace the blade frequently — dull blades grab and tear wallpaper. Three Substrate Options Substrate Best For Half Wall Notes Peel and Stick Renters, temporary looks Peels off clean when you want to change. Repositionable during install. Paste the Wall Smooth Permanent, classic finish Professional recommended. Softly matte finish. Water and humidity resistant. Paste the Wall Linen Textured, premium feel The woven texture adds tactile interest that is amplified at half wall height. Order Samples First Before committing to a half wall, order a $4.99 sample (48cm x 40cm) and hold it at your planned height against the wall. Step back and assess the proportion. The sample is large enough to see the full pattern repeat and gauge how the design will sit in your space. Browse our full wallpaper collection at oliveetoriel.com/wallpaper or explore our hand-painted murals for the ultimate half wall statement. Browse our full wallpaper collection to find the right pattern for your half wall, or start with our removable wallpaper guide for substrate advice. For bathroom half walls, our bathroom wallpaper guide covers humidity-resistant options. See more real installations in our On the Wall journal, including feature walls in real homes and nursery wallpaper installations.
Learn more