On the Wall


Custom Wall Murals: Commissioning Your Own Design
Commission a custom wall mural from your photo, painting, or brief. Olive et Oriel's bespoke wallpaper process, pricing, turnaround and image requirements.
Learn more
Wall Murals for Home Offices: Focus & Zoom-Ready
Designer guide to home office wall murals: 12 office-appropriate options, Zoom-ready rules, scale, colour psychology and placement.
Learn more
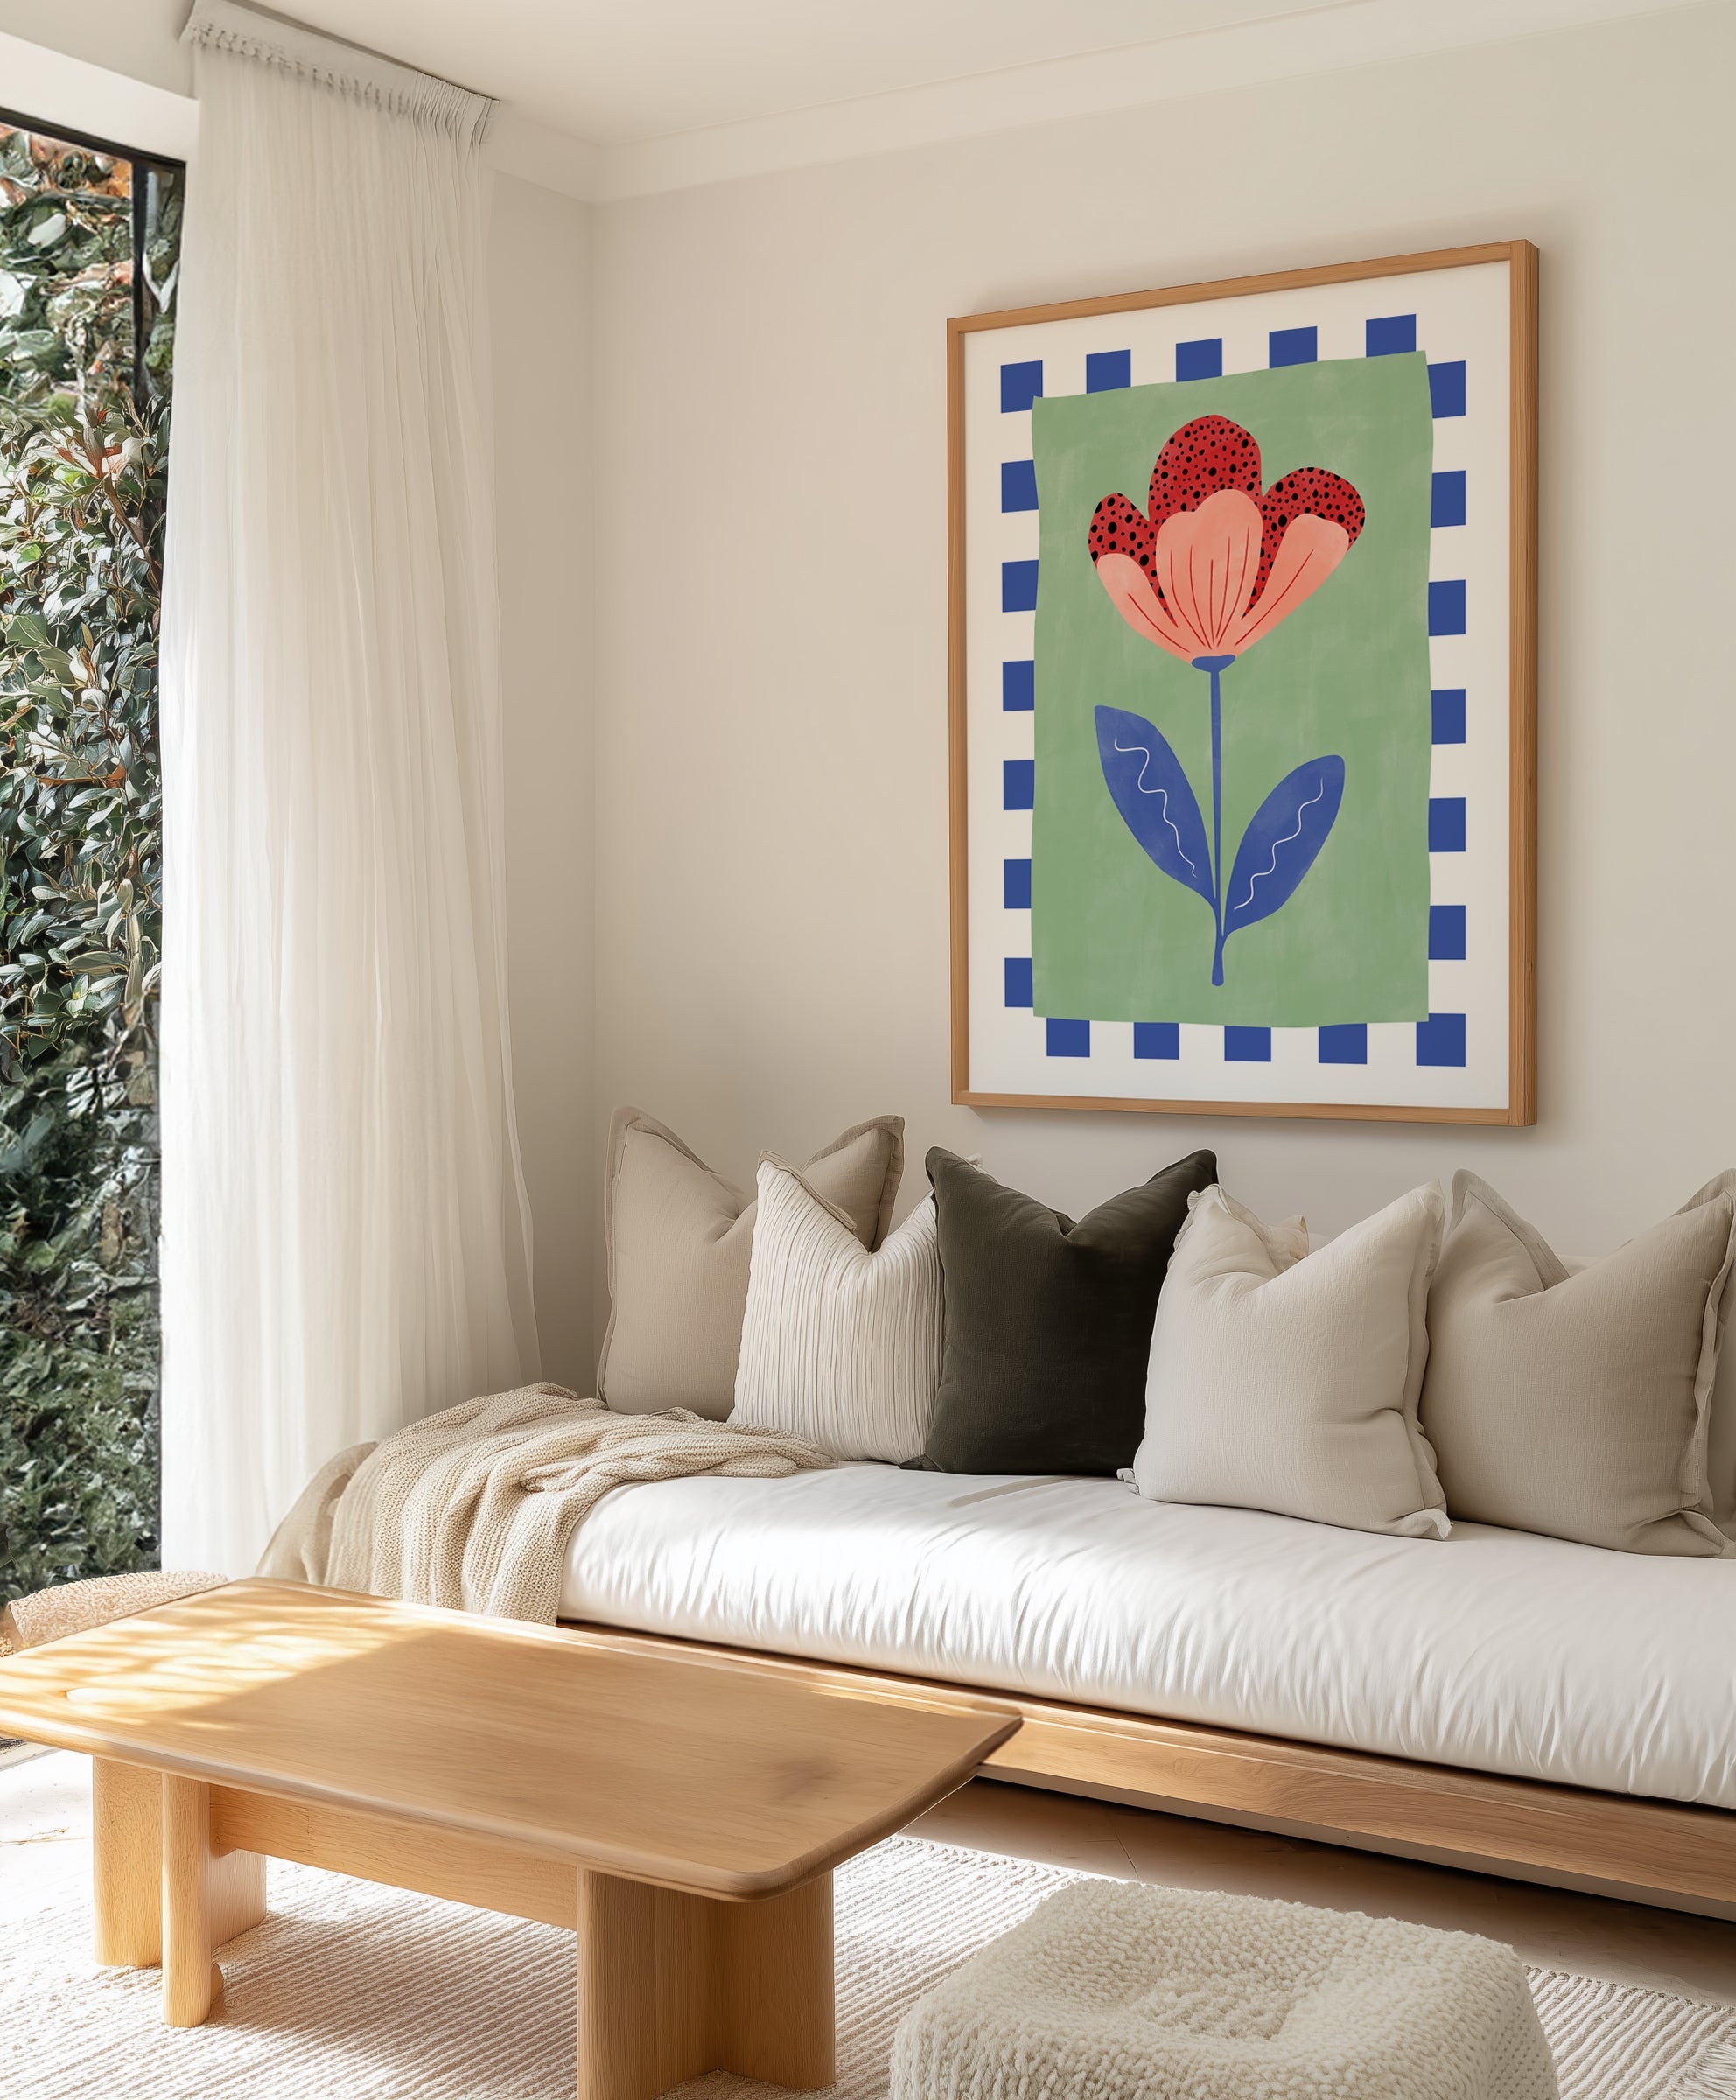
Wall Murals for Kitchens: A Designer's Guide
Kitchens are the riskiest room in the house for a wall mural. They are also, quietly, the room where a mural can do the most work. Every kitchen hosts a daily hospitality moment — a guest walks in, keeps walking past the rangehood, and finds themselves standing inside a painted forest, a coastal horizon or a chinoiserie garden while the kettle goes on. The risk is real. The reward is the reason we keep being asked to design for kitchens anyway. Most decorators will tell you not to put wallpaper in a kitchen at all. We disagree — carefully. Kitchens are a zoned space. Some walls are working walls, covered in splatter and steam, and those are the wrong place for a mural. Other walls are hospitality walls — the dining nook, the breakfast banquette, the butler's pantry, the feature wall opposite the cabinetry — and those are arguably the best mural real estate in the house. This is the designer's guide to doing it properly. Where a mural wins, where it fails, which materials survive a working kitchen, and which twelve murals from our Painted Wall Murals collection actually belong in the room. We ship to more than 40 countries with all import duties covered, and every mural is custom-sized to exact wall dimensions from our Central Coast, NSW studio. Mosswood Forest Panoramic · Vintage Willow Garden Panoramic · Calm Seas Painted Mural The honest placement map: where a kitchen mural wins, and where it fails Before we talk about which design to choose, we have to talk about where it goes. This is the single most important decision in a kitchen. A mural on the wrong wall will fade, grease over and peel at the edges. A mural on the right wall will outlast the cabinetry. Here is the map we give every client. ✅ Dining nook end-wall — the perfect mural zone. The dining nook is far enough from the cooktop to stay clean, close enough to the kitchen to feel like part of the room, and it is a seated moment — people actually look at this wall. A panoramic mural across the nook end-wall is possibly the best use of a mural anywhere in an Australian home. ✅ Breakfast banquette wall — mural wins here. A banquette pushes the mural above eye-level and keeps the mural at a comfortable viewing distance. Because the banquette itself takes the wear, the mural lives untouched above it. ✅ Feature wall opposite cabinetry — great if out of spatter range. The wall you see when you walk into the kitchen, but not the wall your cooktop is against. Keep a minimum of 1.2 metres (roughly 4 feet) between the mural and any heat or oil source. ✅ Butler's pantry / walk-in pantry — the hidden mural moment. A pantry is a small enclosed room where you can go full-drama: deep emerald, moody seagrass, a chinoiserie garden. Because nobody cooks in a butler's pantry, you get all the mood with none of the maintenance. ⚠ Island pendant wall — OK, but audit first. If the island has a sink or hob, treat the wall behind it like a cooking wall. If the island is prep-only and lives opposite a clean feature wall, that feature wall is fine. ❌ Direct above cooktop — fail. Grease aerosolises during cooking. Within six months a mural directly above a working cooktop will yellow, lift at the seams and start to smell of oil. Use tempered glass over a printed mural instead (see splashback section below). ❌ Behind the sink, within 60cm (24 inches) — fail. Sustained water contact is worse for wallpaper than steam. A mural that starts 60cm away from a sink and sits above the tap-splash line is usually fine; a mural that wraps down behind the tap is not. The rule we give clients: mural walls are hospitality walls. If a guest is likely to look at the wall while they sit, it's the right wall. If you stand in front of it holding a frying pan, it's the wrong wall. Six kitchen-mural moods that actually work Once you've picked a hospitality wall, the next decision is mood. Different kitchens want different stories. These are the six mural categories we lean on most often. 1. Botanical / forest — the Hamptons kitchen Cool-light botanical and soft forest murals are the default choice for Hamptons, coastal-country and white-oak kitchens. They bring depth and green to a pale cabinetry scheme without fighting it. Painterly rather than photographic botanicals read as artwork — which is what you want when you're sitting under it every breakfast. Featured: Ethereal Canopy Mural Wallpaper For this brief we specify the Ethereal Canopy Mural across the dining-nook end-wall. When the client wants more floral detail than forest, the Vintage Willow Garden Panoramic Mural is the closest thing we have to a hand-painted tapestry. 2. Coastal panoramic — for coastal homes and beach houses Coastal kitchens usually already have a view — ocean, pool, garden. The mural has to work with that view, not compete with it. Panoramic coastal murals with soft blues, linen tones and tree silhouettes extend the view rather than replace it. We use them on the wall opposite the window, so the outside view and the painted view frame the room from both sides. Coastal Trees Mural · Coastal Palms in Palisade Blue Use the Coastal Trees Mural for the inland-coastal feel — Byron, Newport, the Mornington Peninsula. Use Coastal Palms in Palisade Blue for a bolder Queensland or Pacific-coast brief where the palette can hold more blue. 3. Mediterranean — travertine, olive grove, Marrakech The travertine kitchen is having a long moment — warm stone, plaster rangehoods, oak cabinetry. Mediterranean murals finish the story. Olive groves, cypress hills, distant warm-stone villages. Quieter than tropical palms, warmer than English botanicals — ideal for kitchens where the joinery is already doing the work and the wall just needs to hold the tone. Featured: Olive Groves Painted Mural The Olive Groves Painted Mural sits against travertine and oak; the Marrakech View Painted Mural brings architecture — arches, walls, hills — where straight botanical isn't enough. Both work with lime-wash or plaster-effect walls elsewhere in the room. 4. Moody dark — the butler's pantry mural Dark murals in an open kitchen are a risk, but dark murals in a butler's pantry, walk-in pantry or coffee station are one of our favourite design moves. The small scale of a pantry carries saturation well, and because you don't cook there, the mural stays clean. A guest who wanders in looking for a wine glass finds themselves standing inside an emerald forest. That's the moment. Vintage Woodland Trees in Emerald · Moody Seagrass Panoramic The Vintage Woodland Trees in Emerald Green is our most requested pantry mural. The Moody Seagrass Panoramic is its quieter cousin — less green, more atmosphere, excellent behind open brass shelving. 5. Abstract textural — plaster-effect modern kitchens Contemporary-plaster kitchens don't want a scene — they want texture. Abstract, plaster-effect and mineral-fade murals read as painted walls rather than wallpaper, which is precisely why they work where you want visual depth without narrative. If the rest of the kitchen is limewash, micro-cement or solid-colour joinery, this is the mural category to go to. Featured: Mineral Fade Panoramic in Stone Taupe The Mineral Fade Panoramic in Stone Taupe is our go-to for modern plaster kitchens — layered, almost Venetian-plaster, without any trowel-work. The Abstract Paint Texture Mural is a bolder alternative for a single textural feature wall. 6. Heritage / chinoiserie — traditional kitchens For a period kitchen — Victorian terraces, Federation homes, classic Hamptons — heritage and chinoiserie murals do work that no other wallcovering can. A chinoiserie garden on the dining-nook end-wall of a terrace kitchen turns a three-metre wall into a hand-painted hotel dining room. This category also forgives narrow kitchens best, because the mural pulls the eye past the joinery. Chinoiserie Garden in Soft Blue · Vintage Tapestry Botanica in Emerald Use the Chinoiserie Garden in Soft Blue in lighter period schemes — white joinery, marble benches, soft blue upholstery. The Vintage Tapestry Botanica in Emerald suits darker, more tailored kitchens — green cabinetry, brass hardware, timber floors. Material choice: what actually survives an Australian kitchen Kitchen placement makes material choice matter more than almost any other room. The order of durability runs clean: Non-woven with a vinyl coating: the gold standard for kitchen murals. The substrate is dimensionally stable and the coating lets you wipe the surface. Our default specification for any kitchen mural outside a butler's pantry. Paste-the-wall non-woven: excellent behind banquettes, dining nooks and pantry walls. More forgiving of kitchen humidity swings than traditional paper. Pure paper paste-the-paper: not recommended for kitchens. Paper expands with steam, and the paste can let go over time. Peel-and-stick (self-adhesive): yes, but heavy-duty only. Keep it out of the direct splash zone and use non-woven paste-the-wall for permanent installations wherever possible. Our managing humidity guide for Australian bathrooms covers the chemistry in detail — the logic transfers directly to kitchens. Cleaning and maintenance: the truthful version A kitchen mural is a lifestyle commitment. The honest maintenance story: Vinyl-coated non-woven: wipe with a soft, damp microfibre cloth and a drop of dish soap. No abrasives, solvents or melamine sponges. Paste-the-wall without coating: dust-off only. Blot spills, don't rub. Peel-and-stick: barely-damp cloth, then dry fully — water tracks down and loosens edges. Anything within 1 metre of a cooktop: expect to wipe weekly. If you wouldn't wipe your artwork weekly, move the mural further away. This is why the placement map matters. A well-placed kitchen mural asks for almost no maintenance; a badly placed one asks for it every week. Scale: planning the wall before you plan the design Typical Australian kitchen walls run between 2.5 and 4 metres (8 to 13 feet) wide, with ceiling heights of 2.4–2.7 metres for standard builds and 3m+ for Queenslanders and renovated Federation homes. Because we custom-size every mural to exact wall dimensions, the starting point is always a measurement, never a standard panel. Before ordering, measure every wall in metres and note the size and position of every window, door, powerpoint, switch and pendant cable; the height of the banquette, cabinetry or appliance against the wall; and the ceiling condition (cornices, VJ panels, exposed beams). Our wallpaper measuring guide walks through capturing these numbers, and our complete Australian mural hanging guide covers the install sequence. Lighting: why kitchen spotlighting eats mural drama Most Australian kitchens are lit with 4000K–5000K downlights — great for cooking, brutal for murals. Cool downlights flatten painterly detail. This is solvable. Warm the temperature. Swap cool-white downlights over the mural wall for 2700K–3000K bulbs. The mural will suddenly read as painted rather than printed. Add accent lighting. A wall-washer or picture light over the mural wall transforms it at night. Pendants over a dining nook do this job automatically. Dim everything possible. Murals only come alive once you stop flooding the wall with task light. Galley kitchens vs island kitchens vs open-plan Different kitchen types want different mural strategies. Small galley kitchens: usually one single unbroken wall at the end of the galley. That end-wall is an ideal mural wall — it's the wall you see when you walk in and the furthest wall from cooking splatter. A panoramic mural here visually doubles the room. Island kitchens: the best mural wall is the feature wall opposite the island, at seated bench-level. Avoid the wall behind the island if the island has a sink or hob. Open-plan kitchen / living: treat the dining zone end-wall as the mural wall. The mural defines the dining space without walling it off — especially useful where the kitchen, dining and living room all share the same floor. Splashback murals: when you really do want a mural behind the hob Sometimes the client wants the scene directly behind the cooktop. The wallpaper can't go there, but the design can. Print the mural at scale, then install tempered glass over it as a splashback. You get the mural story with zero damage exposure, because the glass takes all the oil and heat. For bespoke splashback imagery — a photograph of your own garden, the landscape from the kitchen window, an heirloom painting — commission a custom design through our custom wallpaper studio and use the same artwork behind glass. The print can then be repeated as wallpaper on the dining-nook wall, tying the room together without repeating the maintenance risk. Peel-and-stick for rentals with tiny kitchens Renters and tiny kitchens are where peel-and-stick wallpaper earns its place. If you can't paper permanently, a heavy-duty peel-and-stick mural across the dining-nook end-wall is low-commitment and lease-safe. Prep the wall following our peel-and-stick wall prep guide — clean, fully cured paint, no silicone residues. Rental kitchens often have older paint and micro-grease films that defeat peel-and-stick adhesion unless you prep properly. Custom: photograph the view from your kitchen window The move we're asked for most often by clients with a good garden or view: photograph what's outside the kitchen window, and print it as a mural on the opposite wall. The result is a doubled view — the real garden through the window, the painted garden on the far wall. Our custom wallpaper service accepts your own photography, paintings or sketches and resizes them to fit your exact wall dimensions. It is, in our experience, the most personal thing you can put on a kitchen wall. Installation and finding a local professional Kitchen murals — particularly across a dining-nook end-wall or banquette wall — benefit from professional installation. The wall has to be clean, level, cured and primed, with sockets, switches and pendant cables worked around cleanly. Our wallpaper installer directory lists professional hangers across Australia, or use our paste-the-wall install guide if you're a confident DIYer. Further reading on kitchens and murals Companion guides: the designer's guide to the kitchen nook covers the nook wall in forensic detail; choosing the right kitchen wallpaper zooms out to the whole room; wall murals: the statement wall trend dominating 2026 places kitchen murals inside the wider trend story. Browse the full Painted Wall Murals collection when you're ready to shortlist. Frequently Asked Questions Does kitchen humidity and steam damage a wall mural? It depends on the material and distance from the steam source. A non-woven mural with a vinyl coating, installed at least 1 metre from the cooktop and sink, handles normal kitchen humidity comfortably. Pure paper wallpaper within 30cm of a sink or directly above a cooktop will fail — paper expands with humidity and paste breaks down with sustained moisture. Use the placement map above and specify vinyl-coated non-woven. How do I clean a wall mural in a kitchen? For vinyl-coated non-woven murals, use a soft microfibre cloth with warm water and a drop of dish soap. Wipe gently in the direction of the print and dry with a second cloth. Never use abrasives, melamine sponges, solvents or kitchen spray cleaners — these strip the coating. For uncoated paste-the-wall murals in dining nooks or pantries, dust only and blot spills. Can I put a wall mural directly behind my cooktop? No. Wallpaper behind a working cooktop fails within months — grease aerosolises during cooking, yellows the surface, lifts the seams and leaves an oil film that can't be cleaned off. If you want a mural scene behind your cooktop, reproduce it on tempered glass and install that as a splashback; the glass handles the grease and heat, and the mural is preserved visually. Is peel-and-stick wallpaper a viable choice for a kitchen? Yes, with caveats. Heavy-duty peel-and-stick murals work well on dining-nook end-walls, breakfast-banquette walls and feature walls more than a metre from any cooking or water source. Wall prep is critical — clean, cured paint with no silicone residue. Don't use peel-and-stick directly above cooktops, behind sinks, or behind steam ovens. Can I put a mural in my butler's pantry or walk-in pantry? A butler's pantry is arguably the best mural room in the whole house. The space is small, enclosed, not used for active cooking, and rarely gets direct splatter. That means you can use deeper, moodier, more detailed murals — emerald botanicals, moody seagrass, chinoiserie gardens — without the maintenance concerns of an open kitchen. A pantry mural also becomes a small surprise moment for guests who wander in looking for a wine glass. What size should a mural be in a kitchen breakfast nook? Most Australian kitchen nook walls are 2.5–3.5 metres wide and 2.4–2.7 metres tall. A mural should cover the full wall floor-to-ceiling and wall-to-wall — partial coverage reads as wallpaper rather than mural and loses the drama. Because we size every mural to your exact measurements from our Central Coast studio, you always get a single, seamless piece that fits the nook perfectly. Our wallpaper measuring guide walks through how to capture the numbers before ordering. Can I install a mural in a rental kitchen? Yes, with peel-and-stick. It's a landlord-friendly way to transform a rental kitchen without affecting the paint. Install only on the dining-nook end-wall or feature wall opposite the cabinetry — both stay cleanest and are easiest to remove at end of tenancy. Always prep the wall properly and test a small strip before the full install. How much does a custom kitchen mural cost? Kitchen murals are priced by the square metre because every wall is custom-sized from our studio. A typical dining-nook end-wall (around 3m × 2.5m / 10ft × 8ft) is substantially less than a commissioned hand-painted mural and far more flexible. All import duties are covered globally, $4.99 samples ship at 48cm × 40cm (19in × 16in) for colour-matching against cabinetry, and production runs four business days for full-price orders. Browse the Painted Wall Murals collection or commission a one-of-one through our custom wallpaper studio.
Learn more
Wall Murals for Living Rooms: A Designer's Guide
A designer's guide to wall murals for living rooms: six mural moods, AU scale rules, install realities, custom options. Ships globally, duties paid.
Learn more
Wall Murals for Entrances: A First-Impression Guide
The entrance is the most underused mural opportunity in the Australian home. It is the one wall your guests see first, the one you see last every time you leave, and the one that almost never has a sofa, a buffet or a painting competing with it. A mural in an entry is tiny footprint, massive impact. Entries work hard — wet shoes, damp coats, afternoon glare, emotional handover between outside and home — but they rarely get the design attention a living room gets. Whether you live in a Sydney terrace, a London flat, a Brooklyn walk-up or a coastal Queenslander, an entry mural reframes the arrival ritual from functional to cinematic. Because the wall is short, the commitment is short, and entries can hold patterns that a living wall probably could not. Enchanted Grove · Aspen Sky · Heron Lake Scenic Why entries are mural gold Entry walls break almost every rule that makes a mural feel like a gamble elsewhere in the house. There is no sofa in front of them, no buffet cutting off the lower third, no television anchoring the composition. You see the wall cleanly, at full height, usually from a fixed viewpoint (the front door), and usually for less than thirty seconds at a time. That combination — clean sightline, short dwell time, high emotional weight — is exactly what a mural is designed for. A bedroom mural has to survive eight hours of staring from a pillow. A living-room mural has to coexist with a television, lamps, art and a partner with different taste. An entry mural has none of those constraints — it gets to be theatrical, maximalist, cinematic, because that is all the glance you give it. Entries are also threshold spaces, and humans respond to thresholds by paying attention. A bare entry wall wastes that attention; a mural uses it. For the pattern-and-paint angle, our entry hallway wallpaper guide covers the wider territory; this one goes straight to the mural answer. The entry is the only wall in your home where maximalism does not have to apologise to furniture. Six entry-mural moods Before you fall in love with a specific scene, pick a mood. A forest-canopy scene asks for a different console, light and flooring than a moody abstract. Six moods land best in Australian, UK and US entries, with twelve murals from our painted wall mural collection mapped against them. 1. Forest canopy — the nature welcome A forest-canopy entry tricks the brain into feeling like the indoors is bigger than it is. Trees imply depth, vertical lift and air, which makes this mood ideal for narrow hallways where the ceiling is the asset. Pair it with a pale timber console, a linen runner and a single sculptural vase — anything busier fights the canopy. Misty Blue Forest Panoramic · Forest Meadows 2. Panoramic landscape — the vista fake-out Panoramic scenes — aspens, mountains, a dissolving horizon — read like a window where no window exists. In a narrow entry this is a genuine spatial trick. The eye reads the receding plane as distance, which makes a 1.2-metre-wide wall feel twice as deep. This is the move for apartments and terrace houses with windowless entries. 3. Architectural and heritage scene — the sophisticated welcome Heritage scenes — Parisian balconies, European streetscapes, brownstone façades — flatter entries that already have some architectural detail (cornices, arched doorways, period skirtings). They also work in plain apartment entries by adding the architecture the building itself forgot to. If you love New York interiors, our New York wallpaper guide is a useful companion piece for selecting heritage-leaning scenes. European City Dreaming · Paris in the Spring 4. Botanical and floral panoramic — the garden welcome Panoramic florals and chinoiserie-style gardens bring colour without the visual noise of a small-repeat pattern. The scale is the point: a single enormous vine or bloom across a short wall reads as painterly rather than busy. This mood is a strong match for period homes with generous ceiling heights. Chinoiserie Garden Panoramic · Bridgerton Garden 5. Moody dark landscape — the dramatic welcome Dark entries are not a mistake to be corrected with a pale scheme. They are a feature to be amplified. A deep emerald woodland or a navy mineral fade turns a windowless entry into a considered, low-lit moment under warm sconce lighting. Our statement-wall mural trend piece covers why moody scenes are dominating 2026 interiors. Vintage Woodland Trees · Mineral Fade Navy 6. Abstract textural — the modern welcome Abstract and textural murals — washes, brushwork, mineral fades — suit modern apartments and new builds where a figurative scene would feel grafted on. They give you the scale and presence of a mural without locking the entry into a specific place or era. Read as painterly plaster, they work elegantly with polished concrete, terrazzo tile and pale timber floors. Mineral Fade Grey · Painted Pathways Navy Scale and format rules Entries come in three dominant shapes: the narrow-tall hallway, the wide open foyer, and the L-shaped entry that turns a corner into the living area. The mural has to match the shape, not fight it. Narrow tall hallways: vertical scenes — forest canopies, aspens, vertical chinoiserie. The eye lifts up the wall rather than running out of it. Avoid strong horizontal bands; they shorten the hallway. Wide entries: panoramic landscapes and heritage streetscapes earn their keep. Aim for the full width rather than a centred panel — cutting off a panorama reads like an accident. L-shaped entries: the mural can wrap the corner if the pattern is continuous and non-figurative (abstracts, washes, soft florals). For architectural scenes with specific objects — Parisian balconies, brownstones — stop cleanly at the corner and let the second wall stay neutral. Low-ceiling entries (under 2.4m): lean toward vertical movement and avoid a strong horizon line in the upper third. A well-chosen vertical scene can buy 15–20 centimetres of perceived ceiling height. Every OEO mural is made to your exact wall dimensions. That matters more in entries than anywhere else, because entries rarely match standard roll widths — you are almost never dealing with a clean 2.7m x 3m canvas. Our how to measure guide walks you through the two-measurement method for irregular walls. Where the mural actually goes Once shape and mood are decided, placement is next. In a long narrow entry you have up to four candidates for the mural wall. End wall: the most forgiving choice — visible the moment the front door opens. The mural acts as a full-stop. Panoramic landscapes and architectural scenes excel here. Long wall opposite the front door: a side-wall mural seen obliquely as you walk through. Reads as gallery-like; ideal for botanical, abstract or floral scenes with continuous pattern. Above the console: a traditional treatment where the console frames the mural at waist height. Choose scenes with a clear focal point (tree, building, vase) centred above. Ceiling moment: the most theatrical choice. A ceiling mural under a pendant light turns arrival into cinema. Works best in entries with 2.7m+ ceilings and moody or sky-based scenes. The console and the mural If the mural wall hosts a console, compose the two together. The mural is the landscape, the console is the foreground. Keep the console low and uncluttered. Mid-century oak silhouettes, slim black metal frames and pale limewash consoles all recede in front of a busy mural; heavy antique buffets with turned legs compete and lose. Object styling should be sparse — a single vessel, a small lamp, a tray for keys. Three objects maximum. Any more and the eye cannot settle on either the mural or the console, and the arrival moment becomes visually exhausting. Mountain Haze Mirror placement with a mural A mirror in an entry is nearly compulsory — you check yourself on the way out — but placing one on a mural wall is where most entries go wrong. Three rules keep the composition intact. Never centre the mirror on the mural. It cuts the scene in half and the mural reads as wallpaper-with-a-hole-in-it. Offset the mirror to one side so the mural reads as the landscape and the mirror reads as a framed object inside the landscape. Prefer round, arched or irregular mirror shapes over rectangles. Rectangles compete with the rectangle of the mural itself. A round mirror softens the composition and acts as a porthole rather than a second picture. For layering art alongside a mural, our how to hang wall art guide covers spacing, heights and visual weight — the same principles apply to mirrors. Lighting an entry mural Most Australian entries have poor natural light. They are boxed in by the front door, bathroom and living room, with one small window at best. That is a reason to take lighting more seriously in an entry than anywhere else in the house — a well-chosen mural still looks flat under a bare bulb. Two wall sconces positioned on either side of the mural wall at 1.7–1.8 metres from the floor, angled slightly upward. This is the gallery-wash treatment and works for almost every mood. A single pendant centred over the entry, hung at 2.1 metres from the floor (taller ceilings can go higher). Pendants flatter ceiling murals and moody dark scenes. A picture light directly above the mural — a straight copy of the gallery treatment. Ideal for architectural and heritage scenes where you want the scene to read like a painted artwork. Warm white bulbs (2700K–3000K) only. Cool white turns dark murals grey and drains colour from florals. If you are going to the trouble of a mural, do not light it like a hardware store. Period home entries Period homes come with entry proportions that modern homes do not. Each style has a natural mural fit. Queenslanders: high ceilings (often 3.3m), VJ panelling, central hallway front-to-back. The mural wall is almost always the end wall at the rear. Panoramic landscapes and moody dark scenes land well — the ceiling height holds them. Federation homes: pressed metal ceilings, picture rails, dado panelling. Mural goes above the picture rail or on the end wall below it. Heritage scenes and botanicals are the natural match. Californian bungalow: lower ceilings (2.55m), wide entries. Panoramic abstracts and soft florals work; avoid a high horizon line. Brownstone-style terraces: narrow, tall, often dark — forest-canopy and moody-woodland territory. A dark mural amplifies rather than fights the existing mood. Modern apartment entries Modern apartment entries tend to be small, narrow, and often just a thickened section of the living room rather than a dedicated space. That is a benefit: you get to define the entry by the mural itself rather than inheriting a pre-shaped hallway. Bold pattern plus peel-and-stick is the combination to reach for — a full-wall mural draws a clear line between "arrival" and "living" without a partition, and peel-and-stick makes the install fit a standard apartment weekend. For rentals, it is often the only legal option. Renter-friendly options Australian, UK and US rental laws vary but almost all treat pasted wallpaper as a problem at end-of-lease. Peel-and-stick is the rental answer. Our peel-and-stick collection includes every mural in this guide in a removable format — installed dry, peeled off cleanly when you move out. Prep matters. Peel-and-stick fails almost exclusively on dusty, glossy or freshly painted walls. Our peel-and-stick wall preparation guide covers the 48-hour rule, the lint-free wipe-down and the test-strip method. One tactical note: the end wall of an entry is usually the most forgiving to install on because there are no doorframes or architraves to cut around — if this is your first mural, that is the place to start. Order a $4.99 sample before you commit Entries have odd light. The same mural that looks cinematic in a showroom can read flat in an inner-city entry with one east-facing window. Order a $4.99 sample (48cm x 40cm / 19in x 16in) and tape it to the actual wall for 48 hours — check morning light, afternoon light and the lamp light you currently run. Samples are wallpaper only, and they ship globally with all duties paid. Installation in a tight space Entries are the trickiest mural installs in the house — not because the walls are harder, but because there is no room to step back and check alignment. In a 1.2-metre hallway you are standing on the opposite wall every time you want to see the panel you just hung. Three practical notes. First, unroll and order-check panels in a larger room (living-room floor works) before carrying them to the entry. Second, plan for a stepladder that fits inside the entry with you on it — 1.8m folding is usually the maximum. Third, if the ceiling has a light fixture, install around it rather than removing it; the cut-out is easier than the rewire. For paste-the-wall murals, see our paste-the-wall installation guide. For complex entries with arched doorways or niches, our wallpaper installer directory lists tradespeople nationally. A professional install on an entry typically takes two to three hours and is worth it on hallways under 1.2m wide. For the wider theory of mural hanging, see how to hang a wall mural. Commission something personal Every mural here can be re-sized, re-coloured or re-scaled to your exact wall. But entries are also the single best place in the house to commission something entirely custom — a place that matters to you, a family landmark, a coastline from a honeymoon, a skyline you grew up with. The wall is short, the commission cost is contained, and the emotional return every time you walk in the door is outsized. Our custom wallpaper service walks through the process: reference images, sizing, colour direction, proofing. Production runs four business days and the mural ships to 40+ countries with all import duties paid. For more on the emotional case for a personalised entry, see making a first impression that lasts. Designer tips Pick the mood before the mural. Mood dictates console, flooring and lighting more than the specific scene does. Scale the mural to the wall, not the standard roll. Every OEO mural is custom-sized — use our measure guide. Warm-white light only. 2700K–3000K. Cool white kills colour depth. Offset the mirror. Centre-hung mirrors cut murals in half. Prefer round or arched shapes. Order the $4.99 sample before you commit. Tape it to the actual wall for 48 hours. For rentals, specify peel-and-stick and read the prep guide first. Budget for a professional installer on entries under 1.2m — the space is harder to work in than the mural is to hang. Frequently Asked Questions Is a mural too bold for an entry? Almost never. Entries are short-dwell spaces — you spend less than thirty seconds in them per pass. A mural that would feel overwhelming in a bedroom or living room settles comfortably in an entry because you experience it as a moment, not a constant backdrop. What mural options work in a narrow hallway? Vertical-oriented scenes — forest canopies, aspen groves, vertical chinoiserie, tall architectural scenes. These lift the eye up and make the hallway feel taller. Avoid strong horizontal bands or a hard horizon line in the upper third. Panoramic landscapes also work on the end wall because receding depth reads as extended distance. Can I install a mural in a rental entry? Yes, with peel-and-stick. Every mural in our painted wall mural collection is available in a removable format — installs dry, peels off cleanly, leaves no residue on properly prepared walls. The critical step is prep (clean, cured paint, no dust); our prep guide covers it. How much does an entry mural cost? OEO murals are custom-sized to your exact wall, and entry walls are typically smaller than living or bedroom walls — which means entries often come in at the lower end of the mural price range. A typical entry mural (2.4m high x 1.2m wide) starts from around AUD $295 for peel-and-stick and AUD $395 for paste-the-wall. International orders ship globally with all import duties paid, so there are no surprise fees at the border. How difficult is installation in a tight entry? More awkward than technically hard. The mural hangs exactly as it would in a larger room, but there is no room to step back and check alignment. A stepladder under 1.8m is usually the maximum. For entries under 1.2m wide we recommend a professional installer — our installer directory lists tradespeople by region. How do I light an entry mural properly? Two wall sconces on either side of the mural at 1.7–1.8 metres from the floor, angled slightly upward, with warm-white 2700K–3000K bulbs. This is the gallery-wash treatment and suits every mood. Alternatives are a single central pendant (best for moody dark scenes) or a picture light directly above the mural (best for architectural scenes). Cool white bulbs flatten colour and should be avoided on any mural. Can I put a mural behind my existing console? Yes — in fact it is one of the strongest ways to compose the two. Treat the mural as the landscape and the console as the foreground. Keep the console low, uncluttered and silhouette-focused (slim legs, pale timber, black metal). Limit the objects on the console to three: a single vessel, a small lamp and a tray for keys. Heavy antique buffets with turned legs tend to compete with the mural and lose. Can I commission a custom scene for my entry? Yes — and entries are the best place in the house to do it. Short wall, contained commission cost, disproportionately large emotional return. Our custom wallpaper service takes reference images, sizing and colour direction, proofs before production, and ships globally with all duties paid. Production is four business days. Browse our full mural collection, explore peel-and-stick options, or read more design guides on On the Wall.
Learn more
How to Choose a Wall Mural: The Complete Australian Guide
The eleven questions that actually decide whether a wall mural works — room, scale, material, light, pattern category, and commitment. The complete Australian buying guide.
Learn more
Wall Murals for Bathrooms: The Australian Design Guide
Wall murals turn Australian bathrooms into visitor-facing design moments. A designer's guide to moisture, placement, and installation.
Learn more
Wall Murals for Kids Rooms: The Australian Design Guide
The Australian parent's guide to wall murals for kids rooms — nursery to big-kid, safety, peel-and-stick, sizing and custom options.
Learn more
Japandi Wallpaper: A Designer's Textural Guide
Japandi wallpaper is about texture over pattern — plaster, marble, stone. Designer guide to rooms, murals, peel-and-stick and custom options in Australia.
Learn more